If you’re a photographer who spends hours culling and sorting through hundreds—or even thousands—of images in Adobe Lightroom, you know how repetitive and time-consuming it can be. What if you could turn your Xbox controller into a productivity tool?
By mapping a few keys on an Xbox gamepad, you can streamline your workflow and make culling a much more ergonomic experience. Thanks to a small Python script and some clever key mapping, you can now use the A and B buttons to flag or reject photos, and the left/right arrows to navigate between them.
Best of all, this solution works on Mac without needing to invest in the Joystick Mapper app, which costs $10 and isn’t available in Europe.
Why Use an Xbox Controller with Lightroom?
Traditional keyboard shortcuts work, but they’re not always the most comfortable—especially when you’re hunched over your desk clicking through hundreds of photos. Gamepads offer several advantages:
- Comfortable hand positioning that reduces strain during long culling sessions
- Tactile, responsive buttons for quick, confident decisions
- Better posture – you can lean back while culling instead of hovering over your keyboard
With just a few simple mappings, the Xbox controller becomes a natural extension of your workflow.
Controller Mapping
| Controller Button | Lightroom Action | Keyboard Equivalent |
|---|---|---|
| A | Flag as Pick | P |
| B | Flag as Reject | X |
| Left Arrow | Previous Photo | ← |
| Right Arrow | Next Photo | → |
This setup keeps your thumbs working and your brain focused—perfect for fast-paced selection sessions.
How to Set It Up
This solution uses a Python script that monitors your Xbox controller and sends the correct keystrokes to Lightroom using the inputs and pynput libraries.
Prerequisites
- Python 3 installed on your Mac
- An Xbox controller (wired or wireless with Bluetooth)
- Adobe Lightroom Classic
Installation Steps
-
Install the required Python libraries:
pip install inputs pynput -
Download the script:
Get the full code from this GitHub Gist: Xbox Controller for Lightroom – by maxcharlier
-
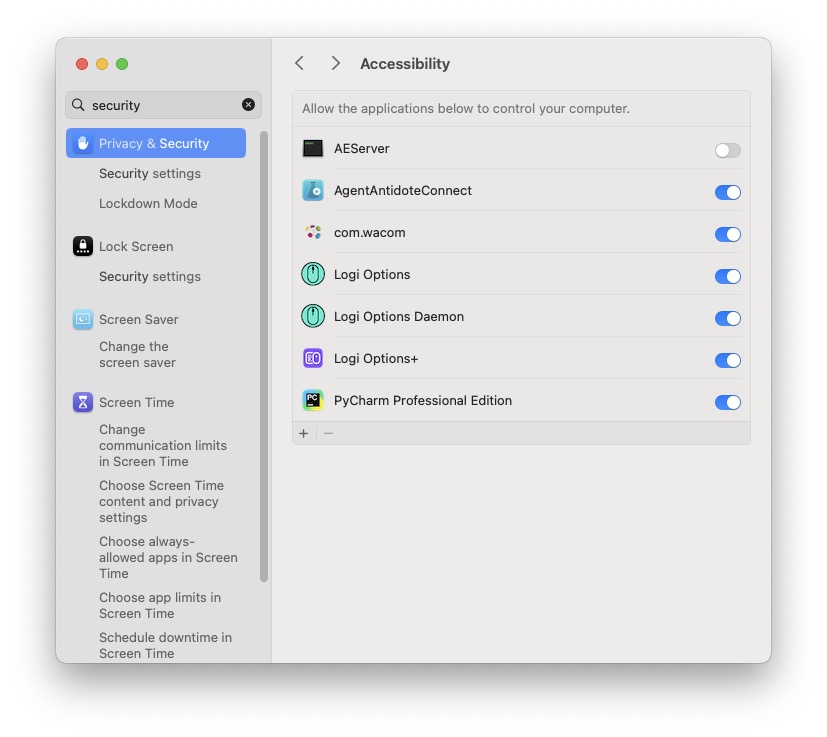
Grant accessibility permissions:
On macOS, you’ll need to allow the application running the script (e.g., Terminal or PyCharm) to control your computer:
- Go to System Preferences > Security & Privacy > Privacy > Accessibility
- Add and enable your Python IDE or Terminal app
-
Run the script:
Execute the script while Lightroom is open and in focus:
python lightroom_controller.py -
Start culling:
Use “A” to pick, “B” to reject, and the D-pad arrows to navigate through your images.
macOS-Specific Considerations
Unfortunately, macOS doesn’t provide a built-in, free way to easily read Xbox controller input and simulate keystrokes like Windows does. Most GUI-based solutions for macOS either don’t support full controller functionality or come with a price tag.
This Python-based approach is your best free alternative on macOS. The main requirement is granting accessibility permissions to allow keyboard simulation.
Important Notes
- Administrator privileges may be required when first running the script
- Tested on macOS only – Windows and Linux behavior may vary
- System-wide key mapping – The script affects all applications, not just Lightroom. Toggle it on/off as needed to avoid interference with other apps
- Controller compatibility – Works best with official Xbox controllers; third-party controllers may require adjustments
Tips for the Best Experience
- Test the mappings in Lightroom’s Grid view (G key) where culling typically happens
- Keep the script running in a terminal window you can easily access to stop it when needed
- Customize the mappings in the script to match your personal workflow preferences
- Use with a wireless controller for maximum comfort and freedom of movement
Final Thoughts
This is a brilliant example of how a bit of scripting and creative thinking can make a meaningful difference in your workflow. If you’re already sitting with a controller on your desk from gaming sessions, why not put it to productive use?
Whether you’re a wedding photographer with 3,000 shots to sift through or a hobbyist looking to speed things up, using an Xbox gamepad with Lightroom can save time and make the culling process feel smooth and natural. The ergonomic benefits alone make it worth trying—your wrists and shoulders will thank you after those marathon editing sessions.
Have you tried using a controller with Lightroom or other creative tools? What’s your preferred culling setup? Share your thoughts in the comments below!